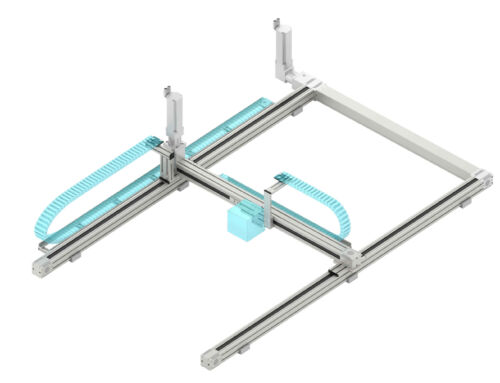
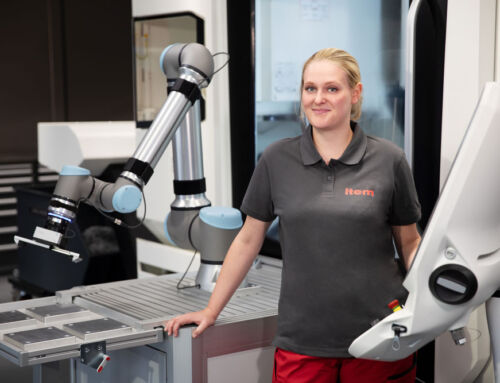
Optical components are made under challenging conditions, but precise factory equipment provides support every step of the way.
Factory equipment engineering for the optical industry in brief:
- The main steps involved in optical manufacturing are development, raw material preparation, assembly and quality control.
- The factory equipment used needs to facilitate maximum precision, even the smallest deviations can compromise optical performance.
- For many process steps, cleanroom compatibility is an absolute must.
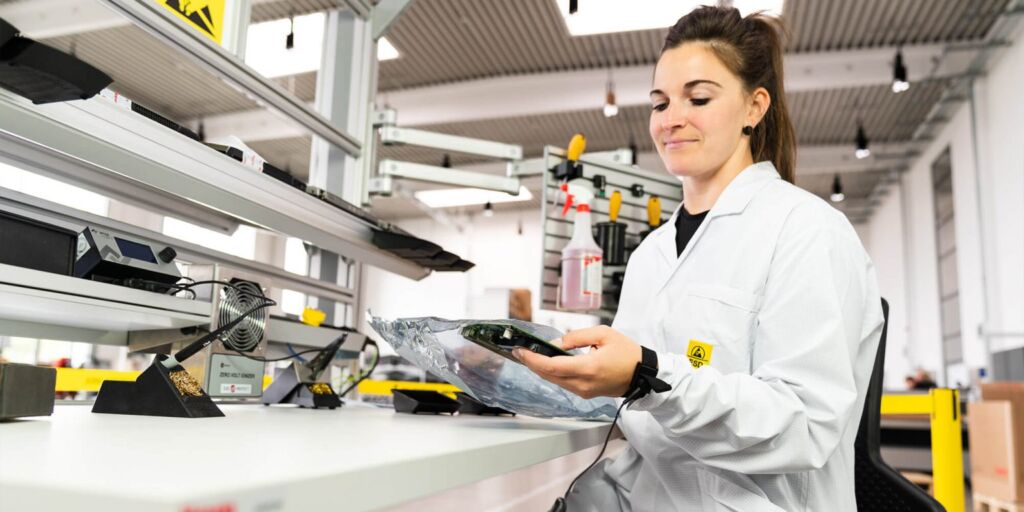
- ESD safety is vital when assembling electronic components.
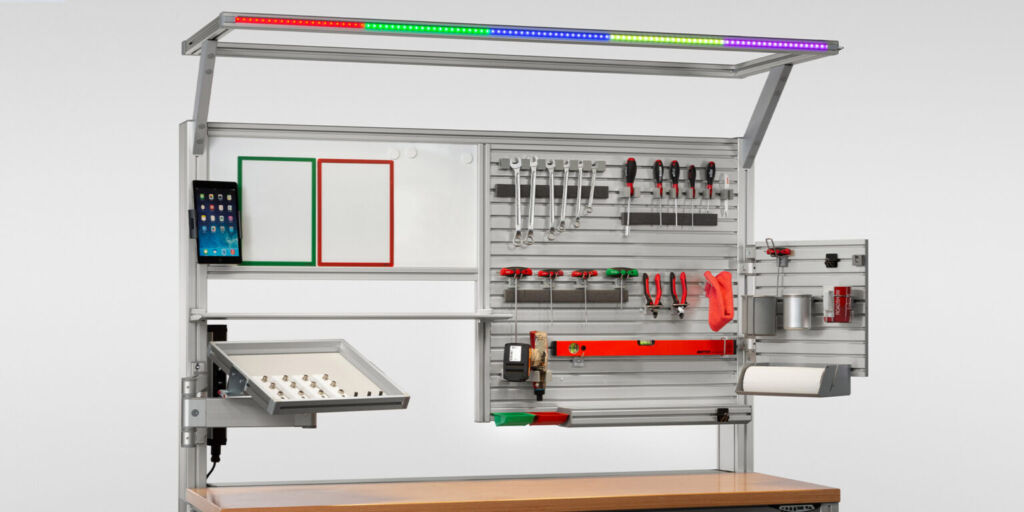
- Typical equipment includes ESD-safe work benches, cleanroom work benches, mini-environments, rack systems and enclosures.
- The modular item Building Kit System offers flexible, cleanroom-compatible and ESD-safe solutions for optical manufacturing industry.
A surgeon looks through their surgical microscope with absolute concentration. They need to be able to identify every detail with pinpoint precision, because millimeter accuracy is vital. Meanwhile, a few streets away, an autonomous vehicle is out on the road. When it reaches a junction, its LiDAR sensor reliably detects every object and every movement. High-precision optical components play a crucial role in both these scenarios. Huge expense and effort go into developing, manufacturing, inspecting and testing these components – and all under the very strictest of conditions.
The optical industry provides key elements for innovations in medicine, mobility, communications and research. But how exactly are optical components and systems manufactured? And what are the requirements for factory equipment in this sector? Join us as we take a look behind the scenes of the optical industry. You’ll discover lots of information, including about the advantages of our modular item Building Kit System for cleanroom solutions and ESD safety.
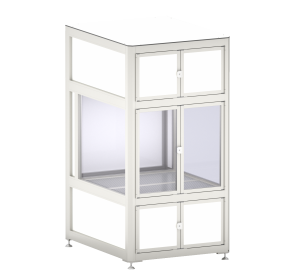 System solutions for cleanrooms
Use the modular design principle to create dependable cleanroom solutions! Whether you need a work bench with laminar flow box, a cleanroom cabin, a partial enclosure, or a walk-in cleanroom, item will help you implement your solution in exactly the dimensions required.
What steps are involved in optical manufacturing?
Optical manufacturing involves four main steps – development, raw material preparation, assembly and quality control. Optical systems and components are designed, precisely machined and put together, and then finally inspected and tested.
Together, these steps ensure top quality and functionality.
Development
During the design process and development, a plan of the optical systems and components is created based on the end product’s requirements.
Raw material preparation
In the raw material preparation stage, the optical material (e.g. glass or plastic) undergoes its initial treatment. This involves complex grinding and polishing processes that require a high level of precision and often have to be performed under cleanroom conditions to avoid contamination. In many cases, anti‑reflective and protective coatings are applied to the optical material
Assembly
A dedicated assembly area is used for the production of mechanical and electronic components. The assembly of electronic components needs to be carried out under ESD‑safe conditions. Depending on the required precision and production volume, overall assembly is carried out either manually or automatically.
Quality Control
During quality control, the finished product is calibrated and readjusted to achieve the desired optical performance. The product is also tested under real conditions to make sure it meets all specifications.
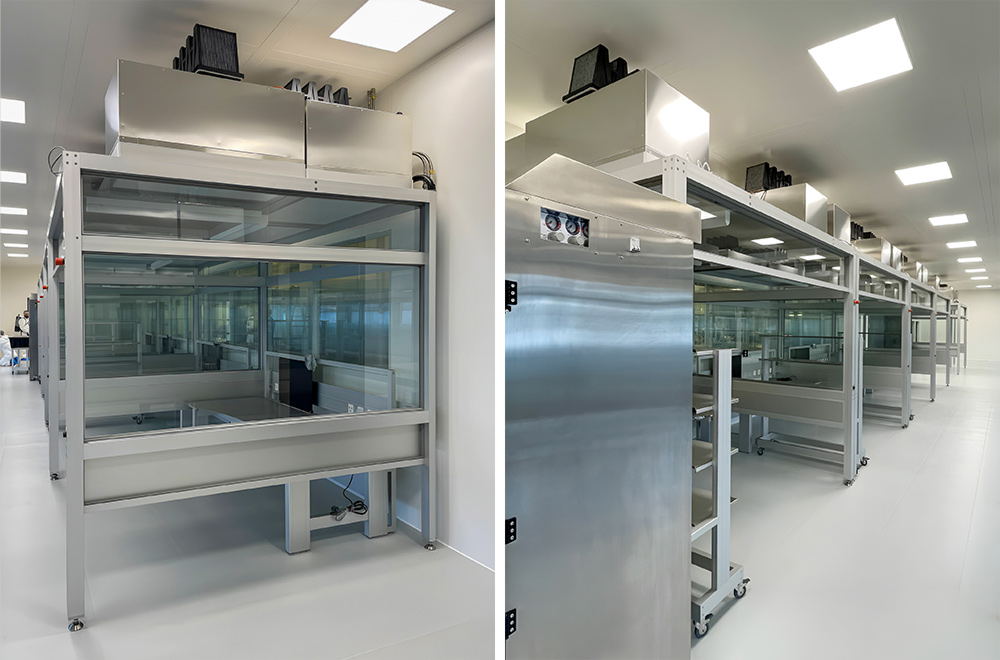
SwissOptic – a full-service supplier of optical OEM solutions for the measurement technology industry – uses these assembly cells, which are based on item components and satisfy the requirements of ISO cleanroom class 5.
What challenges are typically associated with factory equipment engineering for the optical industry?
Stringent precision requirements
Optical components such as lenses, prisms and mirrors must be manufactured with the utmost accuracy, so strict design and manufacturing requirements apply to factory equipment such as fixtures and test benches. Even small deviations can significantly compromise optical performance.
Recommendation: All item products boast precision and high quality, so they are the perfect basis for exact constructions.
Sensitivity to environmental conditions
Optical components are sensitive to environmental influences such as temperature, humidity and dust. This means factory equipment must often be used and stored under strict cleanroom conditions and must not introduce any contamination into optical processes.
Recommendation: item Line X and Line XMS provide the ideal basis for lots of modular cleanroom solutions. They feature excellent resistance to chemicals, minimal edge radii and smooth, unbroken outer surfaces that ensure constructions are exceptionally easy to clean. Why not explore our wide range of sample solutions?
Complexity
Optical manufacturing equipment often has to allow for complex movements and positioning. This is vital to ensure that optical components can be precisely aligned. This equipment includes high-precision fixtures that facilitate highly accurate movements in several axes. Designing equipment of this kind requires an in-depth knowledge of mechanics and optics as well as careful coordination of all components.
Recommendation: Linear Unit KGT 6 60 P20 from item offers repeatability of 0.01 mm, so it can be positioned very precisely. Our drive technology is also ideal for precise positioning tasks.
Integration of measurement technology
A lot of optical manufacturing equipment needs to be equipped with precise measuring systems so you can monitor the positioning and adjustment of optical components in real time.
Recommendation: The flexibility of the modular item profile technology makes it easier to integrate measurement technology precisely.
Miniaturization
As miniaturization in many areas of the optical industry increases, equipment must also become smaller and more precise. This requires specialized manufacturing techniques and a high degree of innovation.
Recommendation: Smaller item product lines offer the perfect solution for miniaturization. For example, Line 5 profiles are ideal for applications that are elegant but stable.
Safety requirements
Equipment used in the production of laser systems or other light-intensive applications have to meet strict safety requirements to protect both employees and the integrity of the products. Designing equipment that is both highly precise and safe when handling intense light sources represents an additional challenge.
Recommendation:
- The modular, flexible item Building Kit System is ideal for creating lightproof cabins.
- In addition, you can integrate active laser protection into partitions.
- You can also use passive laser protection, for example by opting for panels made from anodized aluminum, which are good at dissipating heat.
A closer look at the key steps in optical manufacturing
Material receiving and preparation area
The following process steps take place here:
- Material acceptance and incoming inspections: Visual inspection for damage, verification of material certificates, and metrological inspection of dimensions and tolerances.
- Material storage: Storage of materials in rack systems, documentation and inventory management, and ensuring proper storage.
- Order picking and material supply: Material picking according to parts lists, placement on transport trolleys, and labeling.
- Material preparation: Cutting glass blanks to size, sawing and machining metal parts for mechanical components, and preforming plastic parts. A cleanroom is unnecessary for less sensitive components.
- Cleaning and pretreatment: Cleaning glass blanks and degreasing metal parts.
- Interim storage and logistics
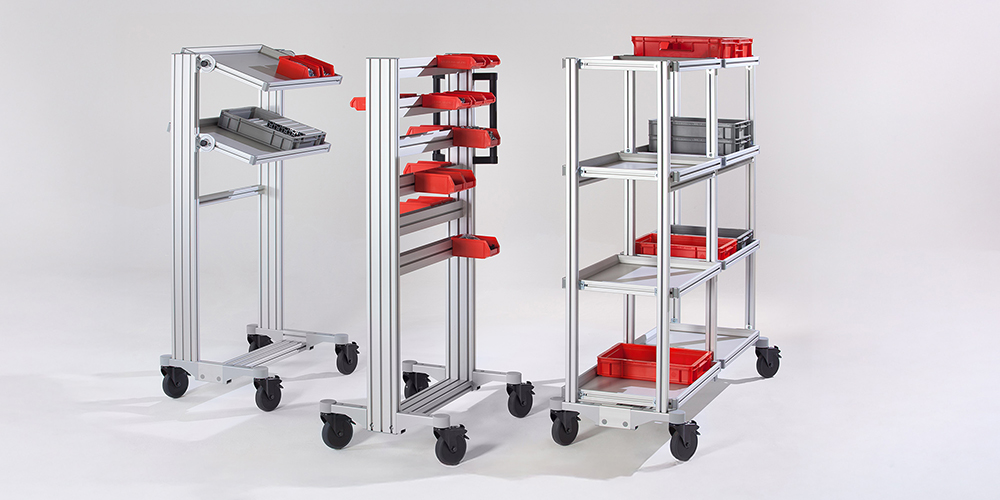
item SystemMobiles are fully customizable material trolleys. They are suitable for all shapes of containers, for transporting workpiece carriers and for direct material picking.
Airlock Area
Material from outside is brought into the cleanroom through a special fixture that is referred to as a material airlock. This fixture ensures that material enters the cleanroom without compromising the cleanliness of the environment.
The usual processes in the material airlock area are as follows:
- Cleaning and preparation: Before the material is placed in the airlock, it is thoroughly cleaned and – if necessary – packaged to minimise the risk of contamination.
- Material airlock: The material is placed in the material airlock, which is located between the outside environment and the cleanroom. This airlock has two doors – one to the outside of the cleanroom and one to the inside. To prevent contamination, these doors are designed so that they cannot both be open at the same time.
- Decontamination process: While in the airlock, the material can be additionally decontaminated, often using air showers, UV radiation or other methods.
- Transfer to the cleanroom: As soon as the material has been decontaminated, the door on the cleanroom side is opened. The material can now be brought into the cleanroom safely.
What factory equipment is typically used in the airlock area of optical manufacturing facilities?
- Seals: High-quality seals on the doors and walls ensure the airlock has an almost airtight seal and prevent particles from outside penetrating to the inside.
- Airlock walls: These are made of materials that are easy to clean and will not release any particles.
- Transport trolley: Height-adjustable SystemMobiles can be adapted to suit the height of the material airlock perfectly. They can also be designed to be cleanroom-compatible.
- Racks and shelves: These are often made of stainless steel or other cleanroom-compatible materials and offer a safe place to put down materials that are being transported through the airlock.
Machining of materials – grinding and polishing in the optical industry
Grinding and polishing are two consecutive mechanical processing steps used to improve the surface quality of optical components such as lenses, prisms or mirrors.
- Grinding: During the grinding process, the surfaces of optical blanks are roughly machined to achieve the desired shape and surface accuracy. This removes material from the surface to eliminate irregularities and minor defects, shaping the optic to the desired form. Rough grinding is performed with coarser abrasives, while fine grinding uses finer-grained abrasives to achieve a smooth surface.
- Polishing: Grinding is followed by polishing – a process that further refines the surface to create an extremely smooth and reflective surface. Polishing is particularly important, because the quality of the polished surface has a direct impact on the optical properties of the component, including transparency, reflection and scattering. Polishing involves the use of special polishing compounds, often in combination with soft polishing tools, to remove material at the micro-level and create a flawless surface.
Coating
Special coatings are applied to workpieces to enhance their optical properties or provide certain protective functions. Cleanroom conditions are required in almost all steps of the coating process. The cleanliness of the environment is crucial for the quality of the coating.
Even the smallest contamination can compromise the functionality of optical components, so cleanrooms to ISO classes 5 to 7 are typically used. The specific requirements depend on the sensitivity of the coating process in question.
Optical manufacturing – what process steps are involved in electronic component assembly?
- Preparing the components: The electronic components such as circuit boards, sensors, lighting units and control modules are tested for quality and functionality. Only once they have successfully passed these tests are they integrated into the assembly.
- Assembling circuit boards: Fitting the circuit boards with electronic components, manual or machine soldering of the components on the circuit board, and cleaning to remove flux residues.
- Integrating sensors and optoelectronic components: Sensors and other optoelectronic components, such as CCD or CMOS sensors used to capture images, are built into the final applications.
- Wiring and connecting modules: The electronic modules and components are all connected via cables and plug-in connectors to ensure electrical functionality.
- Function testing of electronic systems: Once all electronic components have been assembled, extensive function tests are carried out to ensure that all systems work as they should.
Assembling electronic components – what are the challenges for factory equipment?
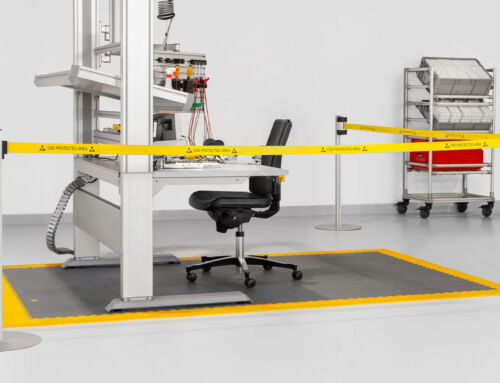
- ESD Safety: Electronic components are extremely sensitive to uncontrolled electrostatic discharges (ESD). It is important to be aware that ESD can cause immediate or progressive damage. For this reason, ESD‑safe factory equipment, such as electrostatically dissipative work benches, ESD wristbands and transport trolleys, is a must.
- High Precision and stability: Assembling electronic components requires a high degree of precision and stability to avoid misalignments and malfunctions. Equipment needs to be extremely stable and generate minimal vibration, because the precise placement and fastening of electronic components is crucial.
- Miniaturization of components: Electronic components are becoming smaller and smaller – and this calls for greater precision during assembly as well as specialized tools and fixtures. High-precision equipment and specialized fixtures are being developed to facilitate the handling and assembly of miniature components.
- Temperature control: Sensitive electronic components can be affected by temperature fluctuations, which can lead to malfunctions. Equipment must be able to maintain a constant temperature or efficiently dissipate heat.
- Integration of test and inspection stations: Electronics assembly work often requires integrated test and inspection stations to check functionality immediately after assembly. It is important that these stations can be seamlessly integrated into the factory equipment.
Thanks to its excellent material quality and versatility, item aluminum profile technology satisfies these stringent requirements.
Process steps involved in the assembly of mechanical components for the optical industry
- Assembling the base frame and stand: Assembling the stand and base and attaching the first moving parts such as swivel joints and holders.
- Assembling focusing mechanisms: Installing focusing screws, toothed racks or motorized focusing mechanisms, and lubricating moving parts where necessary.
- Integrating optical fixtures and carriages: Assembling optical fixtures and carriages that position and move the lenses, mirrors and other optical components.
- Adjustment and calibration: Checking the movement accuracy of focusing units and carriages, calibrating positions to correctly align the optical axis, and performing function tests.
- Final assembly and integration into the microscope housing (example): After all electronic components have been assembled and tested, they are integrated into the microscope housing. ESD safety is required in some instances. Securely installing the electronic assemblies into the housing, connecting external controls (e.g. switches and knobs) to the electronics, and performing a final test to ensure the microscope functions as a complete system.
Process steps for quality control in optical manufacturing
- Optical inspection: Checking the lenses and other optical components for surface defects, scratches or inclusions.
- Measuring optical parameters: Determining the refractive index, transmission, reflection and other optical properties.
- Mechanical testing: Checking the components’ mechanical tolerances and accuracy of fit.
- Electrical testing of electronic components: Following assembly, the electronic components such as control boards, sensors and lighting units are tested for functionality and electrical integrity.
- Overall testing and calibration of the microscope (example): The microscope is tested and calibrated as a complete system. This includes verifying the optical alignment, electronic functionality and precision of mechanical parts.
